Introduction to Cutter
Cutter is a Graphical User Interface (GUI) built around the long-lived radare2 disassembler. The largest problem with radare2 is it’s usability. Whilst radare is efficient to use once mastered, it has many problems for first time users. Running pdf to ‘print disassembled function’ or aaa to analyze and auto-name all functions might seem intuitive to long time users but the tools overall lack of user-friendly guides has seen stunted usage growth.
Cutter has succeeded in porting radare’s fantastic capability into a graphical interface that can compete with the likes of Hopper, IDA, BinaryNinja and Ghidra all while remaining completely free. It also has the added benefit of being multi-platform.
The General Interface
Opening a Binary
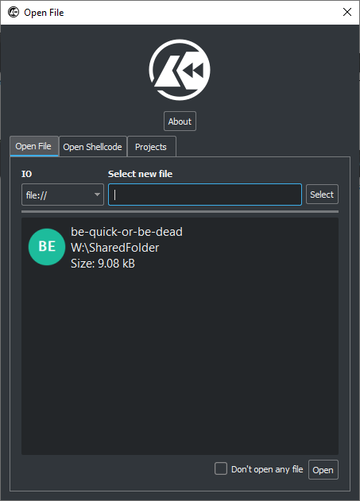
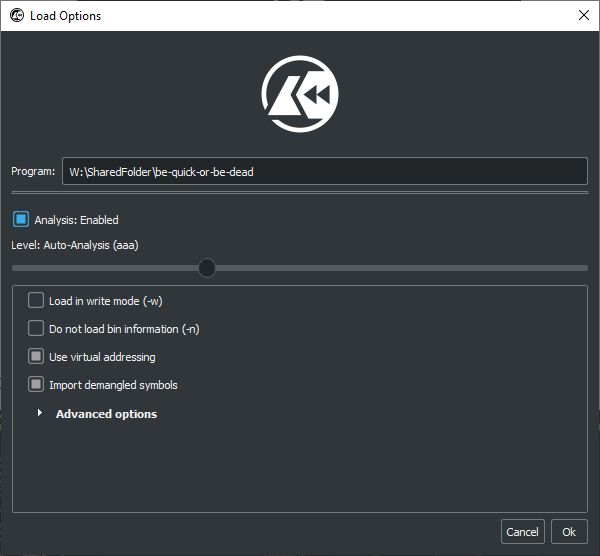
When Cutter first launches up you are presented with the below menu that provides a short history of previously opened files, as well as a way to select files from disk.
Analysis level
In radare2, there are different analysis levels that can be appropriate for different circumstances. Since most CTF binaries are usually relatively small, the default option works fine.
Getting a graph view
Once inside the Cutter project view, the differing panes allow you to see quickly the different parts of the code, and all panes can be resized, moved or closed at will. One of these views in particular, the graph view, is very reminiscent of BinaryNinja and contains the logical flow of the program. When clicking through the different functions in the functions panel the hexdump, dissassembly, decompiler and graph view will all be updated in real time. My personal favourite when trying to figure out different sections of the code is to have the functions on the left, graph view in the middle and Decompiler on the right.
Completing a basic PicoCTF Challenge
To show the basic functionality and usage of the tool I will quickly run through a picoCTF reversing challenge from 2018 titled “be quick or be dead 1”.
Executing the binary
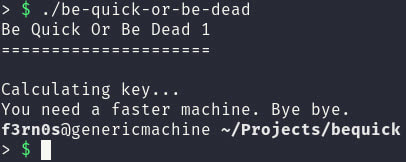
The first step is to investigate the binary to see what file type it is, and then execute it.

Since this is an ELF binary I can run it in my linux environment after giving it the executable flag with chmod +x be-quick-or-be-dead.
Opening it with Cutter
Now that we know the binary has some sort of check preventing us from receiving the flag, we can open it up with cutter.
When opening it I use the default analysis level.
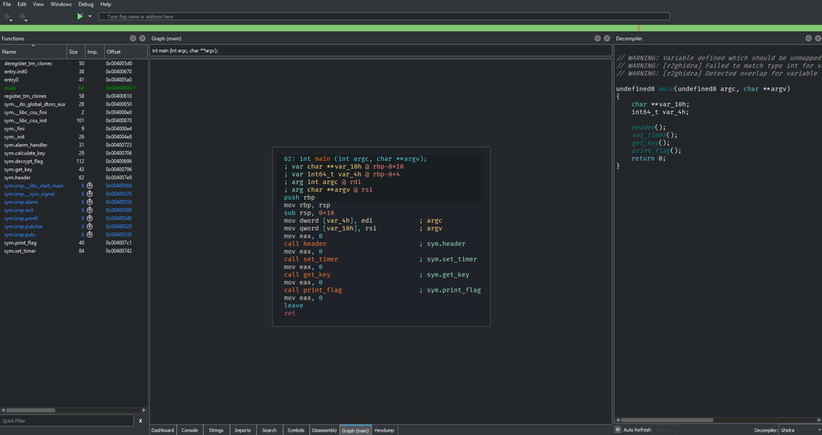
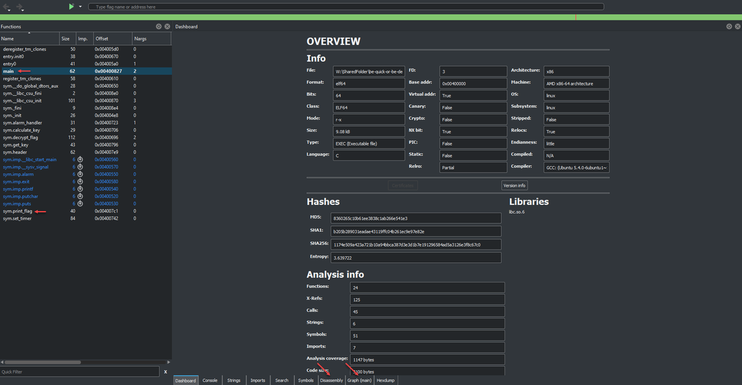
Once cutter is open we are greeted with a lot of information. From this default view we can quickly see some functionality that would be useful. On the left side of the screen we can see all the defined functions in the binary, such as main and print_flag. In the center we can see some useful information about the binary, such that it is an ELF binary. At the bottom we can see the different tab views available to use for analysing the binary.
Analysing the function calls
The first thing we want to is analyse the main function. We can access the main function in the graph view simply by double clicking the main function in the function listing panel. This reveals the graph view of the main function, normally the graph view would show different branches but the main function simply calls four different functions then exits.
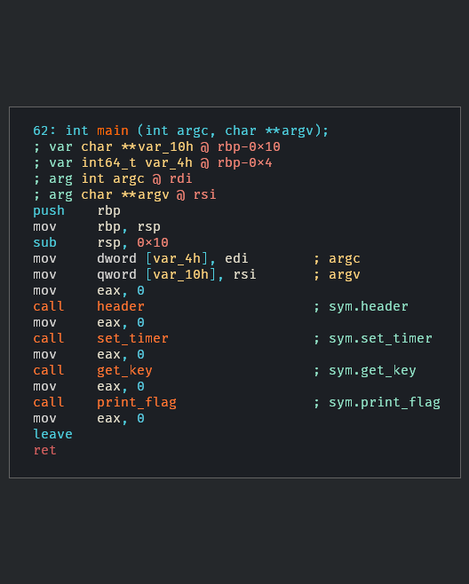
We can see the four different functions, and we can jump to each of their definitions by double clicking them.
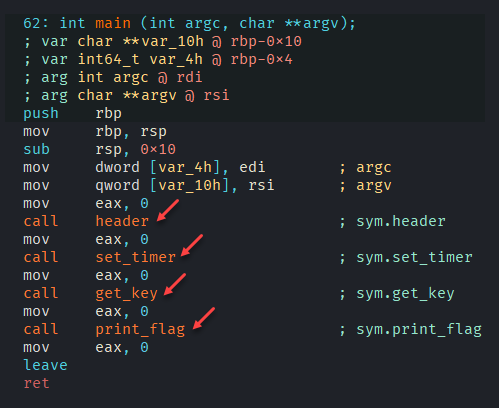
In this case I clicked the print flag function since it seems like the obvious choice.
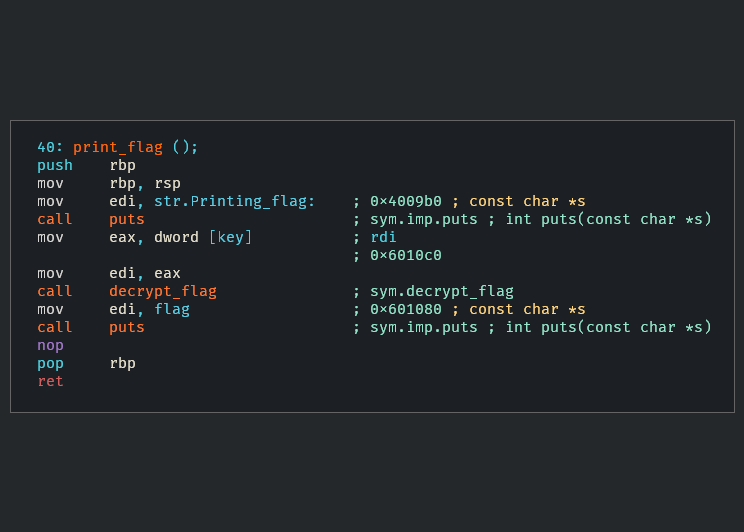
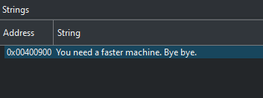
Unfortunately we notice that there is a decrypt_flag function that is run, which probably relates to the main functions invocation of get_key. Since this function has no checks that would cause the binary to fail I decide to take a different approach. When the binary initially ran it printed a message saying that a faster machine was needed, so I decided to look at the strings and see if I could locate the message.

This turned out to be a good choice as we can located the string and it’s address very easily.
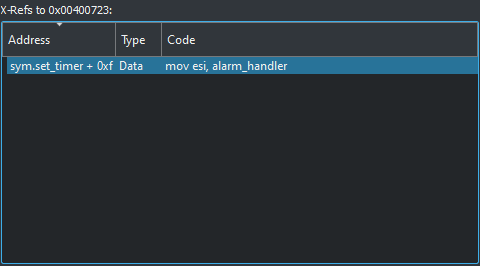
By pressing x while highlighting this string, or right-clicking and choosing show X-refs (cross-references) we can see were this string is used in the code. In this case, it is used in a mov instruction in the alarm_handler function.
|
|
|

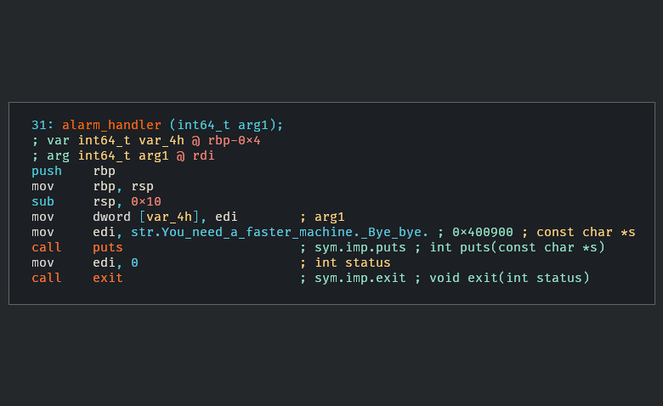
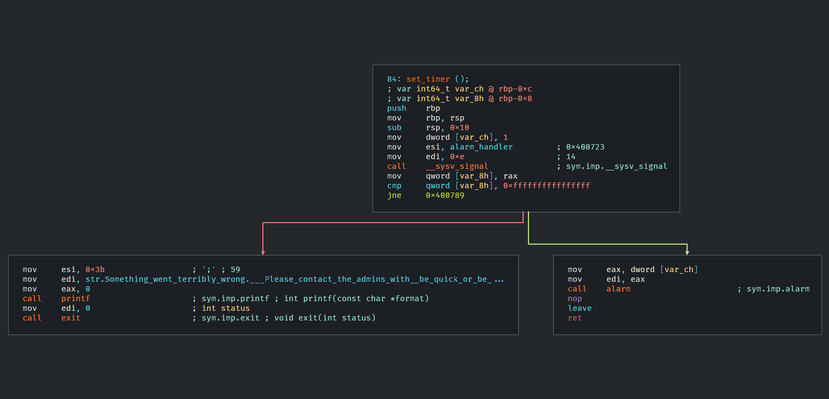
Looking at this function we can see that it calls puts on our string, and then immediately exits. We can find where this function is referenced by going to the functions panel on the left and pressing x again, or right-clicking and choosing show X-refs. This will lead us closer to our culprit. In this case we can see that the function is only referenced in the set_timer function.
We can now try to understand the functionality of the set timer function to figure out why our program ends abruptly. We can also see cutters branching come into play in this function as it uses a jne (Jump if not equal) instruction to see if an error code is raised after calling __sysv_signal.
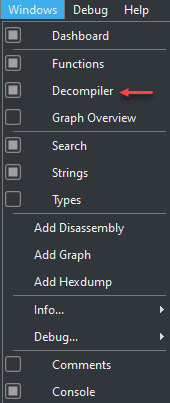
Now that we have found our culprit function, we can look into how exactly it works. A useful tool when trying to figure out the functionality of some machine code is a decompiler. Cutter actually comes with a C++ rewrite of the Ghidra decompiler, as well as it’s own retdec. We can enable this decompiler view by going to the top bar and clicking Windows -> Decompiler.
|
|
|
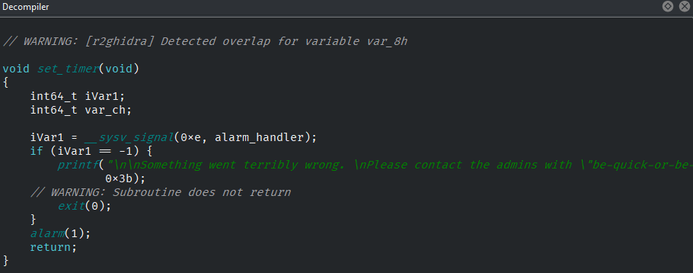
This decompiler view allows us to more readily understand the set_timer function.
We cab see that the function has two significant system calls, one to __sysv_signal and the other to alarm. To understand these functions I like to use man pages.
The two pages I used for this analysis are:
From this I was able to infer three important pieces of information.
__sysv_signal is used to set a function to be called when a specific signal is sent inside the binary.
0xe, or 14, refers to SIGALRM.
alarm will send SIGALRM after a given number of seconds.
So in this case the function will:
- Set
alarm_handlerto run when the binary sendsSIGALRM - Set the binary to send
SIGALRMafter 1 second.
So by removing the call to alarm from the binary, alarm_handler should never be hit and the binary should finish running as expected.
Patching the binary with NOPs
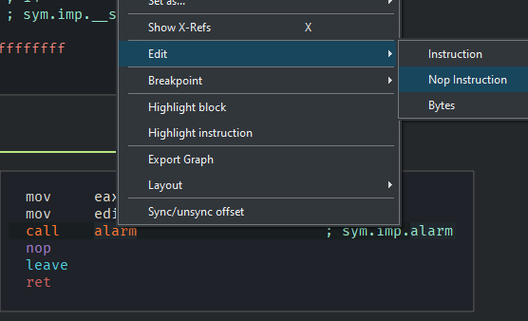
When patching the binary it is important to remember that you are changing the binary on disk, and that it is wise to create copies of the binary in it’s original state. What we want to do in this case is change the call to alarm to a NOP (No Operation) instruction so that the binary will not terminate prematurely. We can do this by right clicking the call to alarm in either the disassembly, graph or decompiler view and choosing Edit -> Nop Instruction. I personally recommend doing this through the graph or disassembly view to ensure the correct instruction is NOP’d.
Getting the flag
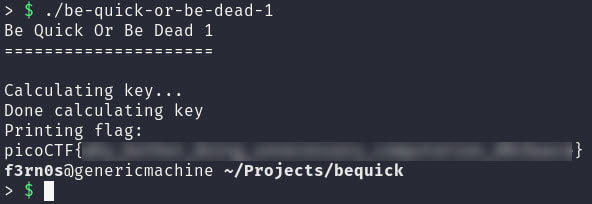
Now that alarm is never being called, we can shut down cutter and run the binary and we should get the flag.
There are definitely a couple other ways we could have done solved this challenge and some unanswered questions.
- Why was the binary taking so long to run?
- What happens if we NOP the call to set_alarm?
- Can we use a debugger to ignore SIGALRM? (GDB will do this by default).
All in all Cutter is a solid tool that is built on a well maintained project and it should see continual improvements into the future.